Skip to content
  • support@bgpgroup.com.au
  • 1300 827 154
  • NBN Coverage
  • Opticomm Coverage
  • My PABX
  • Home
  • Internet Plans
  • Mobile Plans
  • Business
    • Hosted Pbx
    • Microsoft Teams Voip
    • Phone Packages
    • Docs
  • Need Help?
    • Guides & Support
    • Uptime & Outages
  • Contact Us
Login / Register
$0.00 0 Cart

eFax

  • How to Prepare & Upload Voice Prompts to PBX Announcements
  • Scan to Email – Brother
  • eFax By Email
  • eFax Messenger
  • eFax Online
  • How To Use a Fax Machine

Handsets

  • Cisco
    • Manual Configuration of Cisco SPA IP Handsets
  • Yealink
    • Hold and Resume
    • How to Change the Logo/Wallpaper on Yealink Handsets
    • Transfer calls using a Yealink DECT phone (W53H, W56H)
    • PBX Yealink T5 Dect Mode
    • Yealink SIP IP Phone Comparison
    • Transferring Calls on Yealink Handsets
    • Paging Configuration on Yealink Devices
    • Yealink Teams Phone Comparison
    • Yealink DECT Handsets
  • Zoiper
    • Softphone Error Troubleshooting
    • Zoiper Softphone Configuration

Hosted PABX

  • Building Your Phone System
    • How to Configure Inbound Numbers
    • How to Configure Internal Numbers
    • How to Configure Web Callback
    • How to Configure a User License & Device License
    • How to Configure Voicemail
    • How to Configure Inbound Email Alerts
    • How to Configure Time Conditions
    • How to Configure Call Flow Controls
    • How to Configure Geo Routing
    • How to Configure Custom Announcements & Prompts
    • How to Configure Your Automated Voice Menu (IVR)
    • How to Configure Your Automated Voice Menu (IVR)
    • How to Configure DTMF prefix
    • How to Configure Call Diversions
    • How to Configure CallerID Prefix
    • How to use Set Caller ID
    • How to Enable Call Recordings
    • How to Configure Ring Groups
    • How to Configure Call Queues
    • How to Configure Queue Priority
    • How to Configure Queue Callbacks
    • How to Configure Queue Wallboards
    • How to Configure Inbound Fax-to-Email
    • How to Configure Phonebooks
    • Default Settings Configurations
    • How to Configure Global Blocklists
    • How to set up User(s) with External Number(s)
    • How to Prepare & Upload Voice Prompts to PBX Announcements
    • How to Block or Hide Caller ID
    • How to Restrict Dialing Destinations
    • How to Configure SMS to email
    • How to Import/Export Call flow
    • How to Configure Real Time Call Monitoring
    • How To Use Tabs In Your PBX
    • Device Twinning
    • How to Configure Call Parking
    • How to Configure Conferencing
    • How to Configure Blocklist
    • How to Configure PIN codes
    • How to Configure SIP Trunks
    • How to Configure Dial Tone Access (DISA)
  • Webphone
    • Webphone Troubleshooting
    • Webphone Configuration
    • Webphone End User Set Up
    • Webphone Overview

Internet

  • Connect Your BYO Modem
  • Home Internet troubleshooting

Microsoft Teams

  • Skype Communication via Microsoft Teams
  • Microsoft Teams Audio Conference Integration
  • Microsoft 365 Teams
  • How to Troubleshoot Microsoft Teams

On Premise PBX

  • Panasonic
    • How do I configure a Panasonic KX-NS SIP trunk?

SIP Trunks

  • Configuring a SIP trunk to 3CX
View Categories
  • Home
  • Docs
  • Hosted PABX
  • Building Your Phone System
  • How to Configure Inbound Fax-to-Email

How to Configure Inbound Fax-to-Email

2 min read

Introduction #

At the end of this article, you will be able to configure a PBX fax to email object within your call flow on the PBX tab. The article will also assist you with some common uses of the object within your call flow configuration. Should you need any assistance, feel free to contact our support department.

Configuring a PBX fax to email #

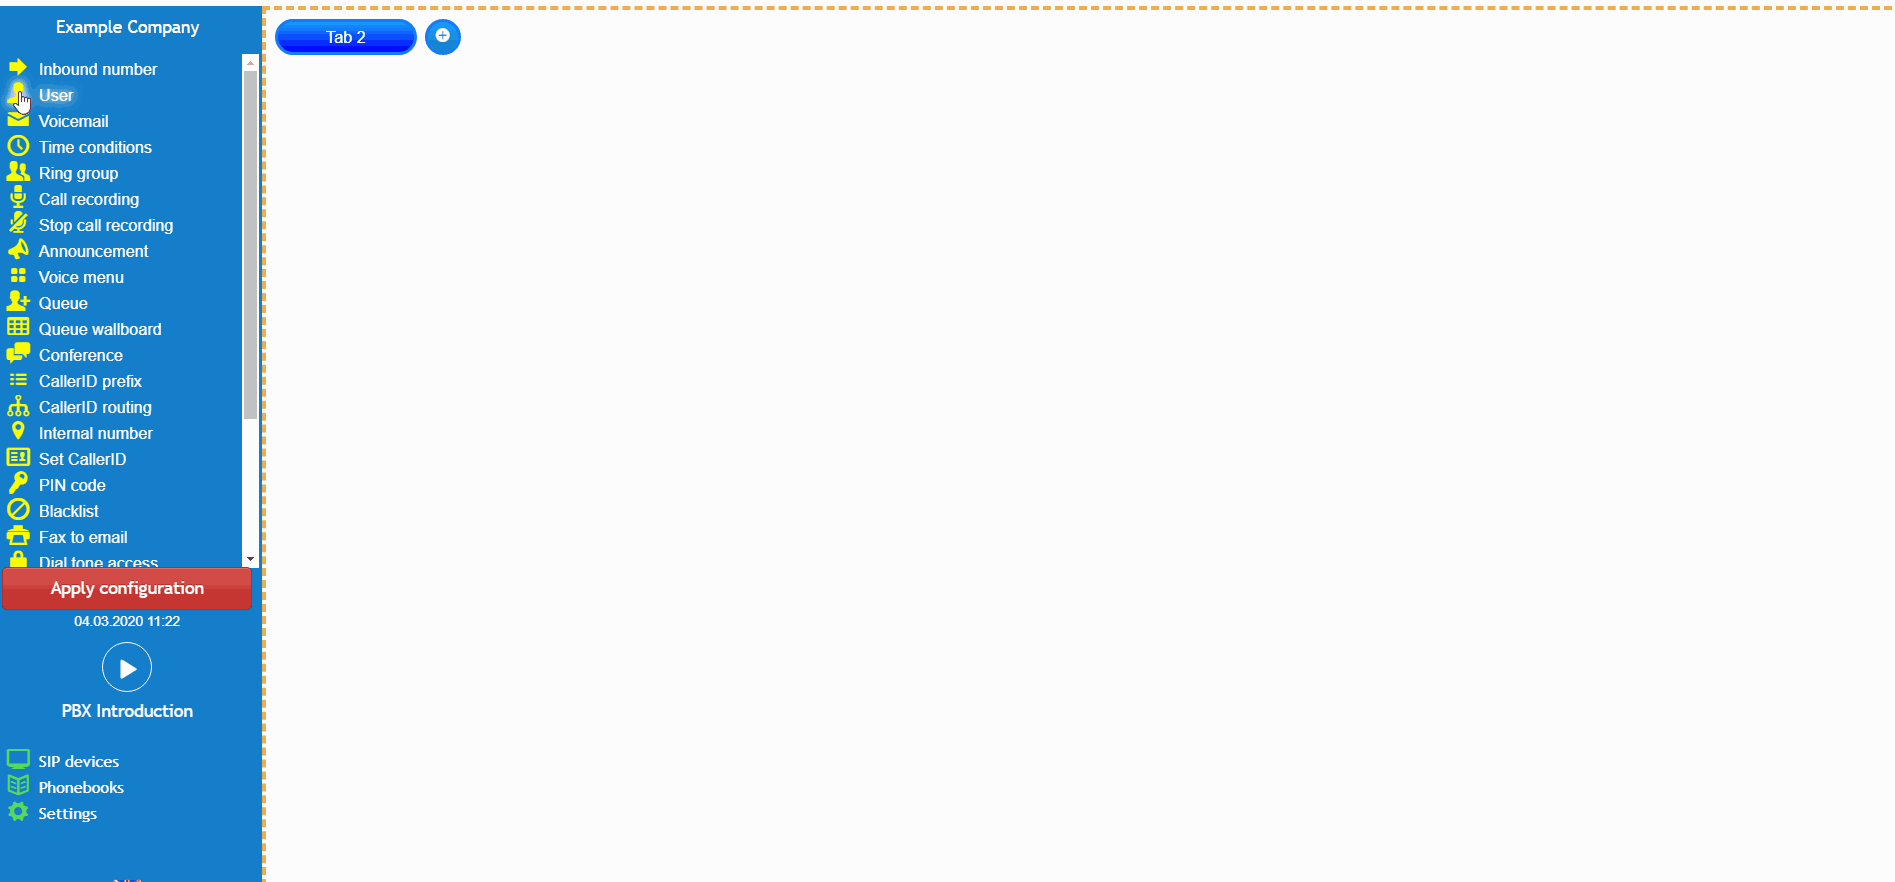
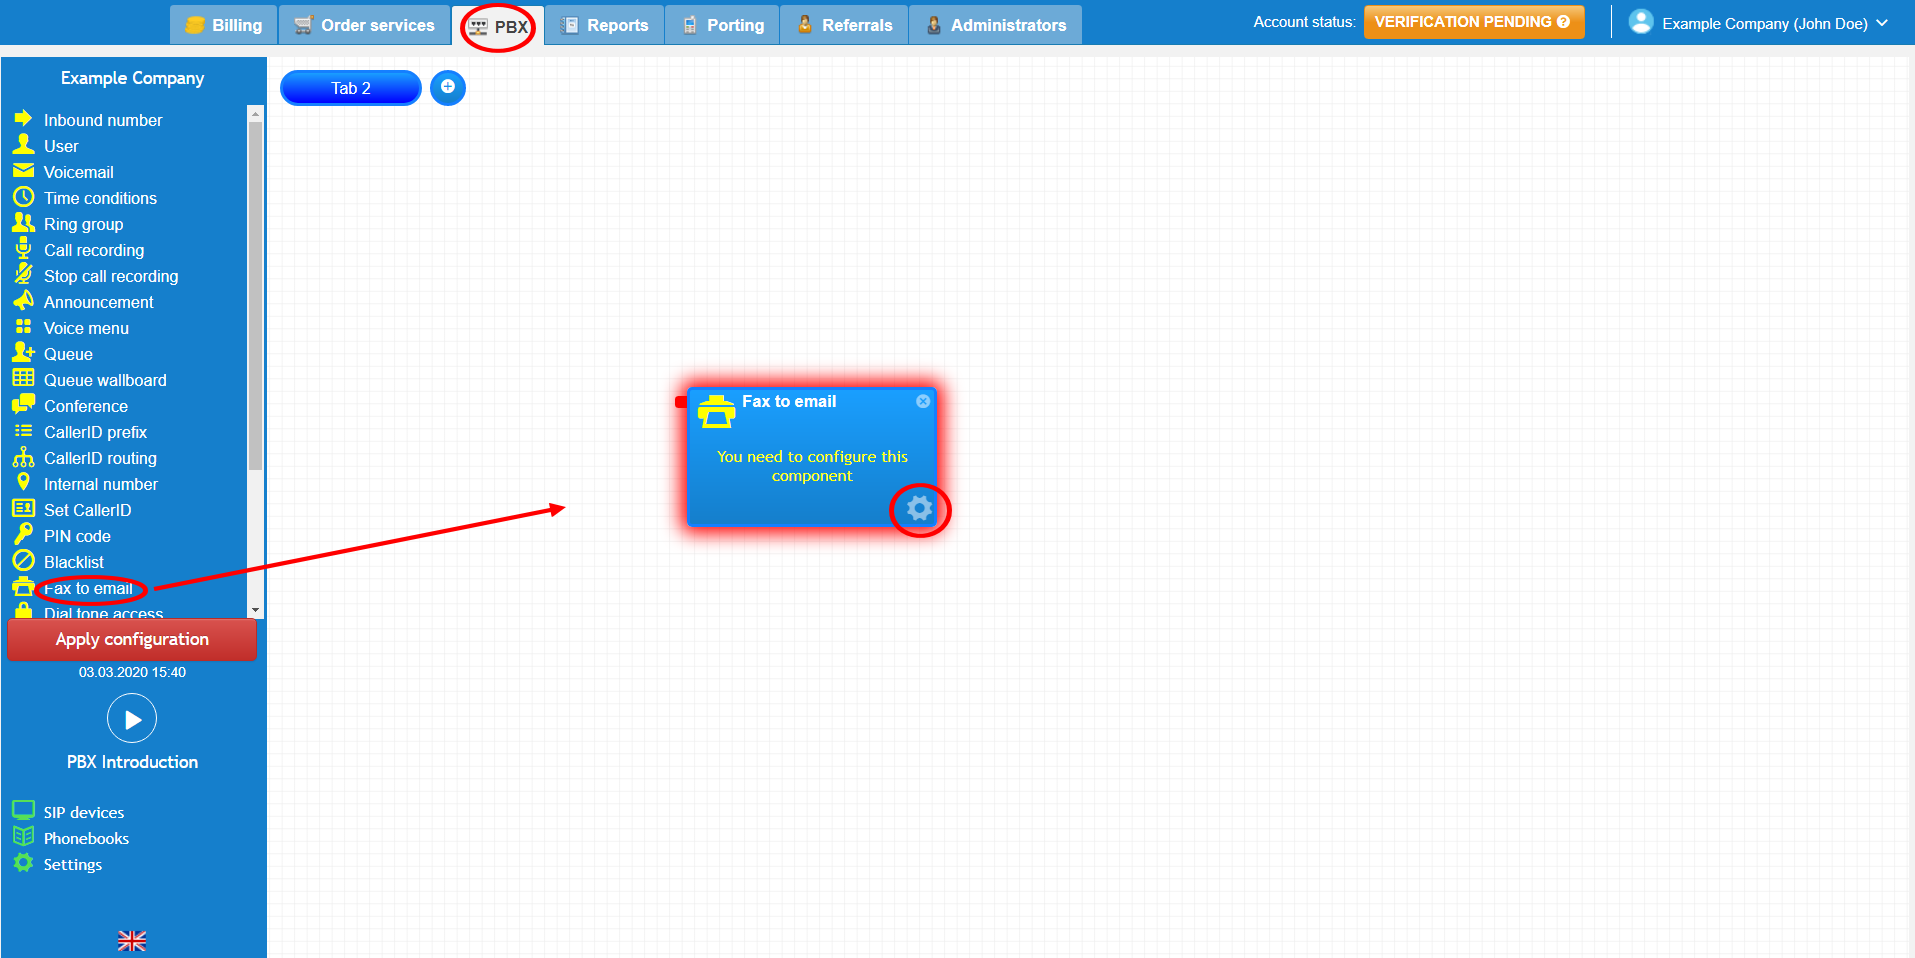
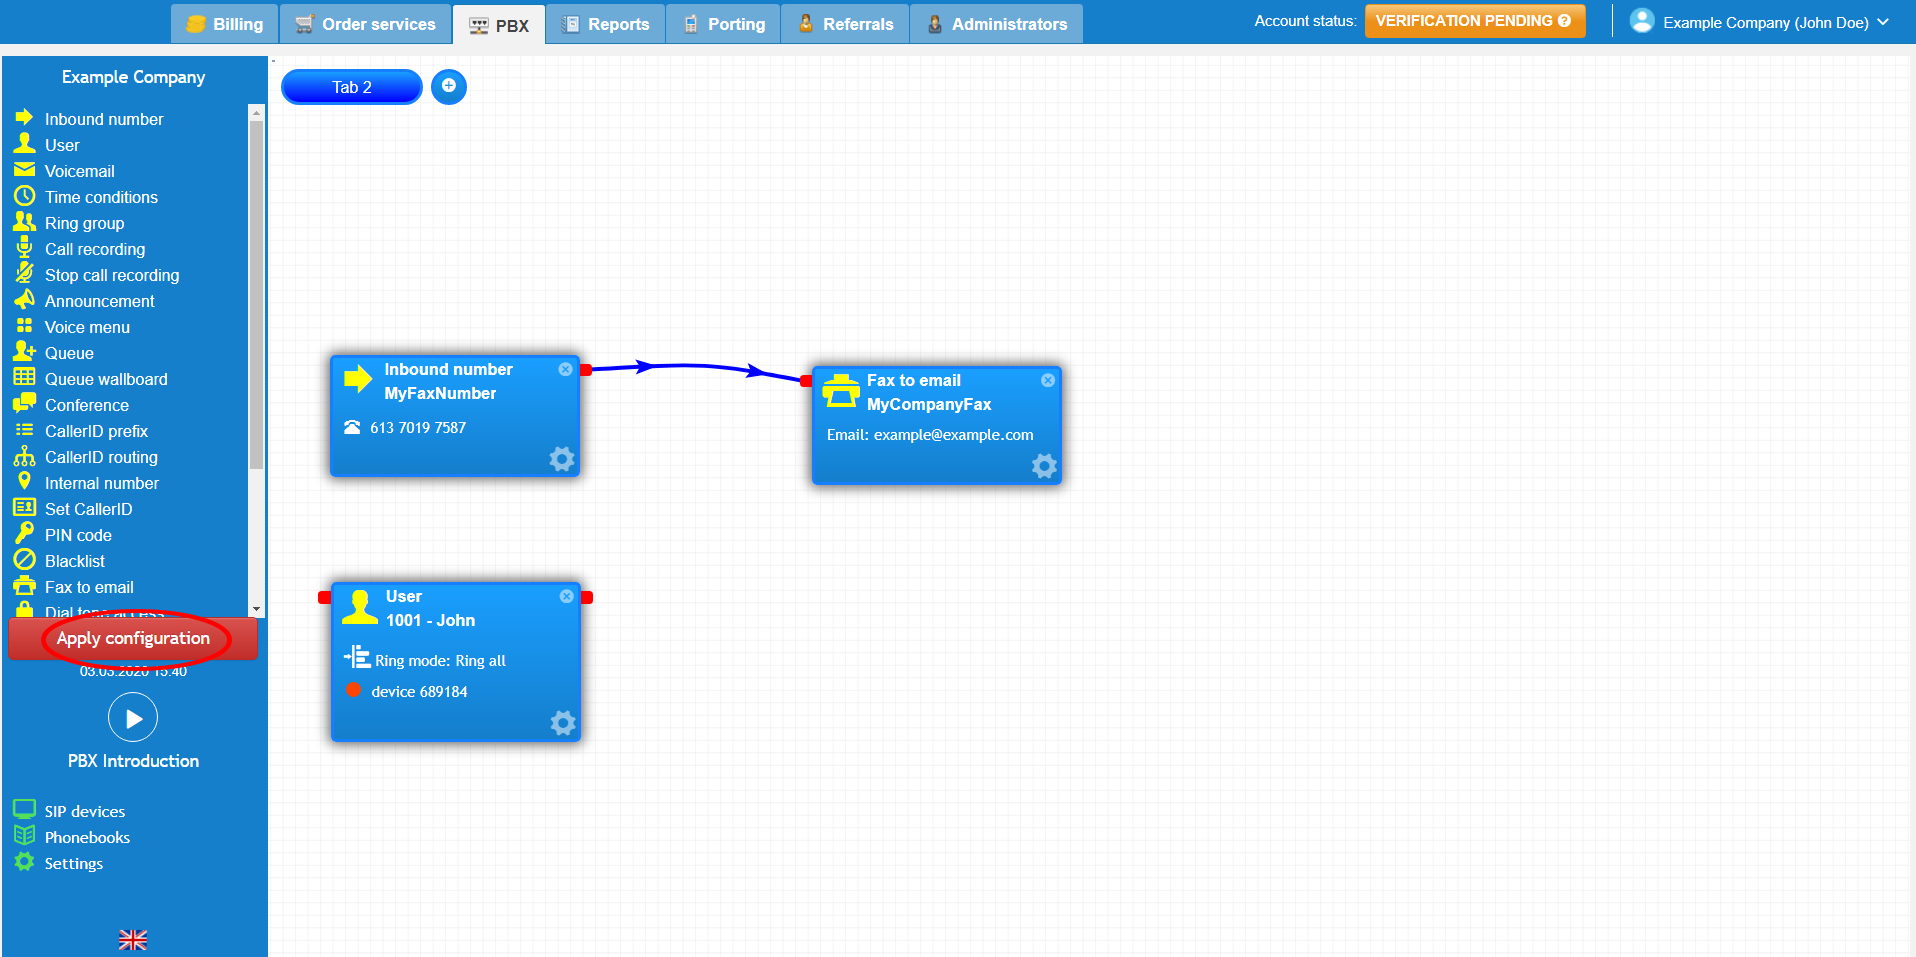
The PBX fax to email is a feature which allows you to receive inbound faxes, in PDF format. However, outbound fax requires an ATA (Analog Telephone Adapter) and configuration not included in this guide. Once logged in on the customer portal click on the PBX tab. Then select Fax to the email from the toolbox menu on the left, drag and drop it onto the main configuration screen. Next, click on the settings icon.

faxtoemail1.PNG

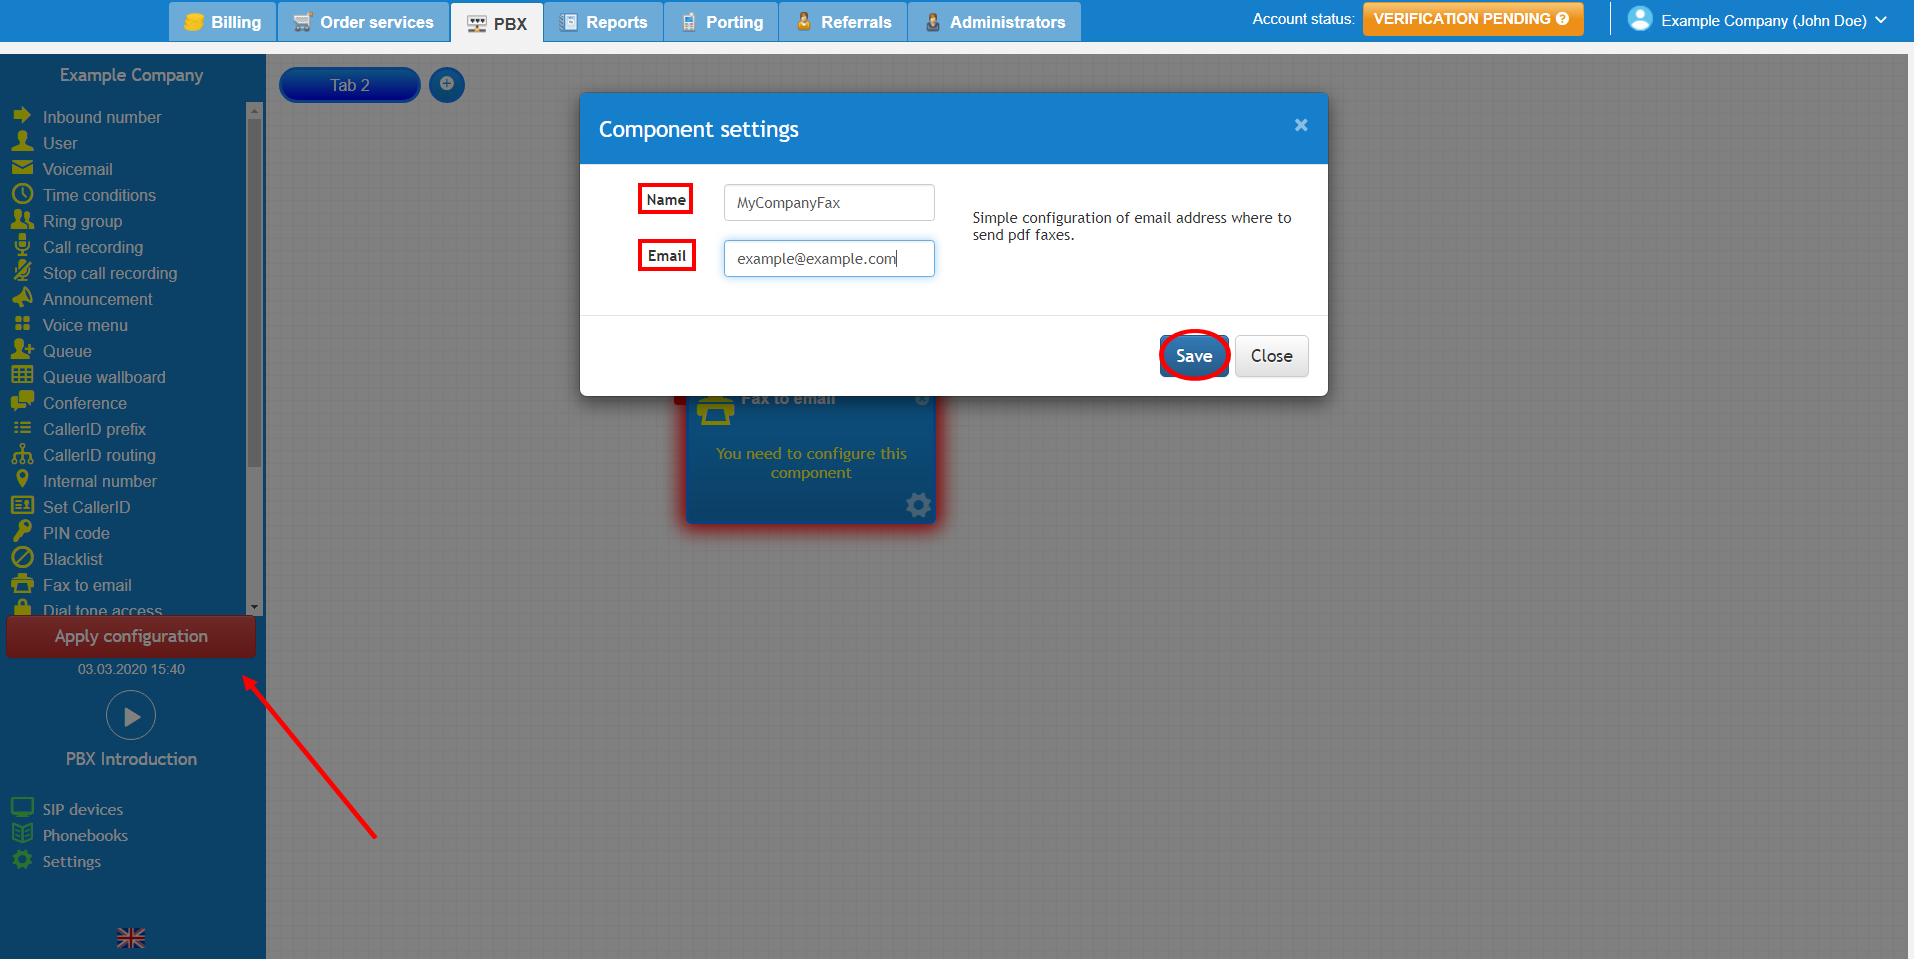
After that, you should fill with your preferred name and email address you would like to be sent the inbound faxes in PDF format. Finally, click on save and apply the configuration.

faxtoemail2.PNG

Fax to email usage #

This scenario simulates an employee of an organisation who needs to set up a company-wide inbound fax number to email service. You must first start with adding your fax number to the PBX tab, providing a name and selecting your fax number from the available numbers window, inside the settings of the inbound number. Then simply connect to your fax to email object, which will then mean all inbound faxes to the fax number you have selected will be converted to a PDF, and emailed to your nominated email address.

faxtoemail3.PNG

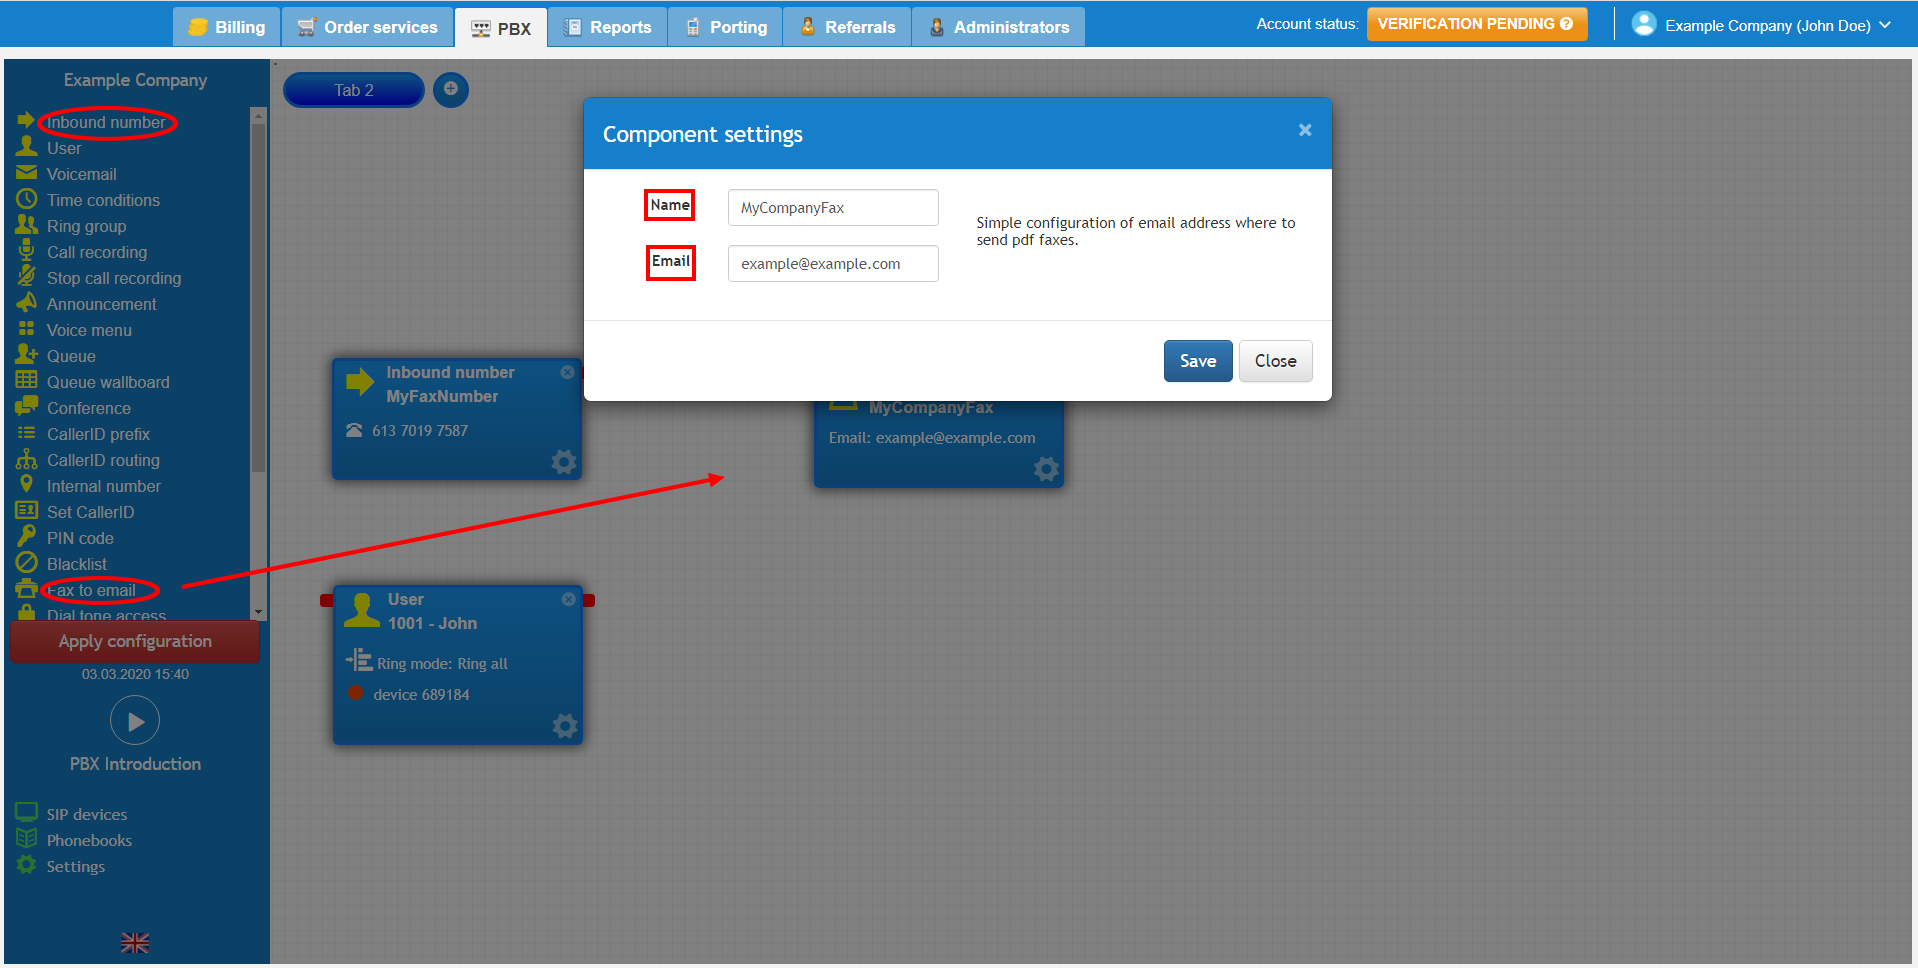
Should you wish to send the inbound faxes to multiple email address, please contact your mail provider and request a distribution group to be configured to multiple email addresses, you will then use the distribution group email address inside the fax to email object. Lastly, don’t forget to apply the configuration of your final call flow.

faxtoemail4.PNG

Watch this in action #

The video below will show you a visual representation of the areas covered throughout this knowledge base guide.

gif.gif
What are your Feelings

Share This Article :

  • Facebook
  • X
  • LinkedIn
  • Pinterest
Still stuck? How can we help?

How can we help?

Updated on September 25, 2025
How to Configure Internal Numbers
Table of Contents
  • Introduction
  • Configuring a PBX fax to email
  • Fax to email usage
  • Watch this in action
Facebook-f Instagram Pinterest

Company

  • About us
  • Leadership
  • Careers
  • News & Article
  • Legal Notices

Support

  • Help Center
  • Ticket Support
  • FAQ
  • Contact us
  • Community
Get exclusive deals by signing up to our Newsletter.
©CopyRight 2025 | bgptelecom.com.au