Skip to content
Facebook
  • My Portal
  • My PBX
  • My Hosting
  • Help Me
  • Business
    • 1300/1800 Number Plans
    • Business Internet
    • Business PABX Sign Up
    • Business Phone Plans
    • Equipment & Hardware
    • Hosting Pans
    • Microsoft Teams & VoIP
    • Mobile
    • SIP Trunking
  • Corporate
  • Need Help?
    • Guides & Support
    • Log a Ticket
    • Uptime & Outages
  • Contact Us
  • 1300 827 154
Menu
  • Business
    • 1300/1800 Number Plans
    • Business Internet
    • Business PABX Sign Up
    • Business Phone Plans
    • Equipment & Hardware
    • Hosting Pans
    • Microsoft Teams & VoIP
    • Mobile
    • SIP Trunking
  • Corporate
  • Need Help?
    • Guides & Support
    • Log a Ticket
    • Uptime & Outages
  • Contact Us
  • 1300 827 154
  • Residential
    • Mobile
  • Business
    • 1300/1800 Number Plans
    • Business Internet
    • Business PABX Sign Up
    • Business Phone Plans
    • Equipment & Hardware
    • Hosting Pans
    • Microsoft Teams & VoIP
    • Mobile
    • SIP Trunking
  • Corporate
  • Need Help?
    • Guides & Support
    • Log a Ticket
    • Uptime & Outages
  • Contact Us
  • 1300 827 154
Menu
  • Residential
    • Mobile
  • Business
    • 1300/1800 Number Plans
    • Business Internet
    • Business PABX Sign Up
    • Business Phone Plans
    • Equipment & Hardware
    • Hosting Pans
    • Microsoft Teams & VoIP
    • Mobile
    • SIP Trunking
  • Corporate
  • Need Help?
    • Guides & Support
    • Log a Ticket
    • Uptime & Outages
  • Contact Us
  • 1300 827 154

eFax

  • How To Use a Fax Machine
  • eFax Online
  • eFax Messenger
  • eFax By Email
  • Scan to Email – Brother
  • How to Prepare & Upload Voice Prompts to PBX Announcements

Handsets

  • Cisco
    • Manual Configuration of Cisco SPA IP Handsets
  • Yealink
    • Yealink DECT Handsets
    • Yealink Teams Phone Comparison
    • Paging Configuration on Yealink Devices
    • Transferring Calls on Yealink Handsets
    • Yealink SIP IP Phone Comparison
    • PBX Yealink T5 Dect Mode
    • Transfer calls using a Yealink DECT phone (W53H, W56H)
    • How to Change the Logo/Wallpaper on Yealink Handsets
    • Hold and Resume
  • Zoiper
    • Zoiper Softphone Configuration
    • Softphone Error Troubleshooting

Hosted PABX

  • Building Your Phone System
    • Device Twinning
    • How To Use Tabs In Your PBX
    • How to Configure Real Time Call Monitoring
    • How to Import/Export Call flow
    • How to Configure SMS to email
    • How to Restrict Dialing Destinations
    • How to Block or Hide Caller ID
    • How to Prepare & Upload Voice Prompts to PBX Announcements
    • How to set up User(s) with External Number(s)
    • How to Configure Global Blocklists
    • Default Settings Configurations
    • How to Configure Phonebooks
    • How to Configure Inbound Fax-to-Email
    • How to Configure Dial Tone Access (DISA)
    • How to Configure SIP Trunks
    • How to Configure PIN codes
    • How to Configure Blocklist
    • How to Configure Conferencing
    • How to Configure Call Parking
    • How to Configure Queue Wallboards
    • How to Configure Queue Callbacks
    • How to Configure Queue Priority
    • How to Configure Call Queues
    • How to Configure Ring Groups
    • How to Enable Call Recordings
    • How to use Set Caller ID
    • How to Configure CallerID Prefix
    • How to Configure Call Diversions
    • How to Configure DTMF prefix
    • How to Configure Your Automated Voice Menu (IVR)
    • How to Configure Your Automated Voice Menu (IVR)
    • How to Configure Custom Announcements & Prompts
    • How to Configure Geo Routing
    • How to Configure Call Flow Controls
    • How to Configure Time Conditions
    • How to Configure Inbound Email Alerts
    • How to Configure Voicemail
    • How to Configure a User License & Device License
    • How to Configure Web Callback
    • How to Configure Internal Numbers
    • How to Configure Inbound Numbers
  • Webphone
    • Webphone Overview
    • Webphone End User Set Up
    • Webphone Configuration
    • Webphone Troubleshooting

Internet

  • Home Internet troubleshooting
  • Connect Your BYO Modem

Microsoft Teams

  • How to Troubleshoot Microsoft Teams
  • Microsoft 365 Teams
  • Microsoft Teams Audio Conference Integration
  • Skype Communication via Microsoft Teams

On Premise PBX

  • Panasonic
    • How do I configure a Panasonic KX-NS SIP trunk?

SIP Trunks

  • Configuring a SIP trunk to 3CX
  • Home
  • Docs
  • Handsets
  • Yealink
  • Yealink DECT Handsets

Yealink DECT Handsets

Table of contents

In this article #

  •  Introduction
  •  Connecting the device and locating the IP address
  •  Transferring calls using a Yealink DECT phone (W53H and W60H)
  •  Blind transfer
  •  Semi-attended transfer
  •  Attended transfer
  •  Yealink T5 DECT mode
  •  Setting up the Yealink handset as a DECT base
  •  Transferring calls between handsets on T5 DECT mode

Introduction #

At the end of this article, you will be able to manually configure your Yealink DECT handset with a SIP device within your PBX. Should you need any assistance, feel free to contact our support department.

Connecting the device and locating the IP address #

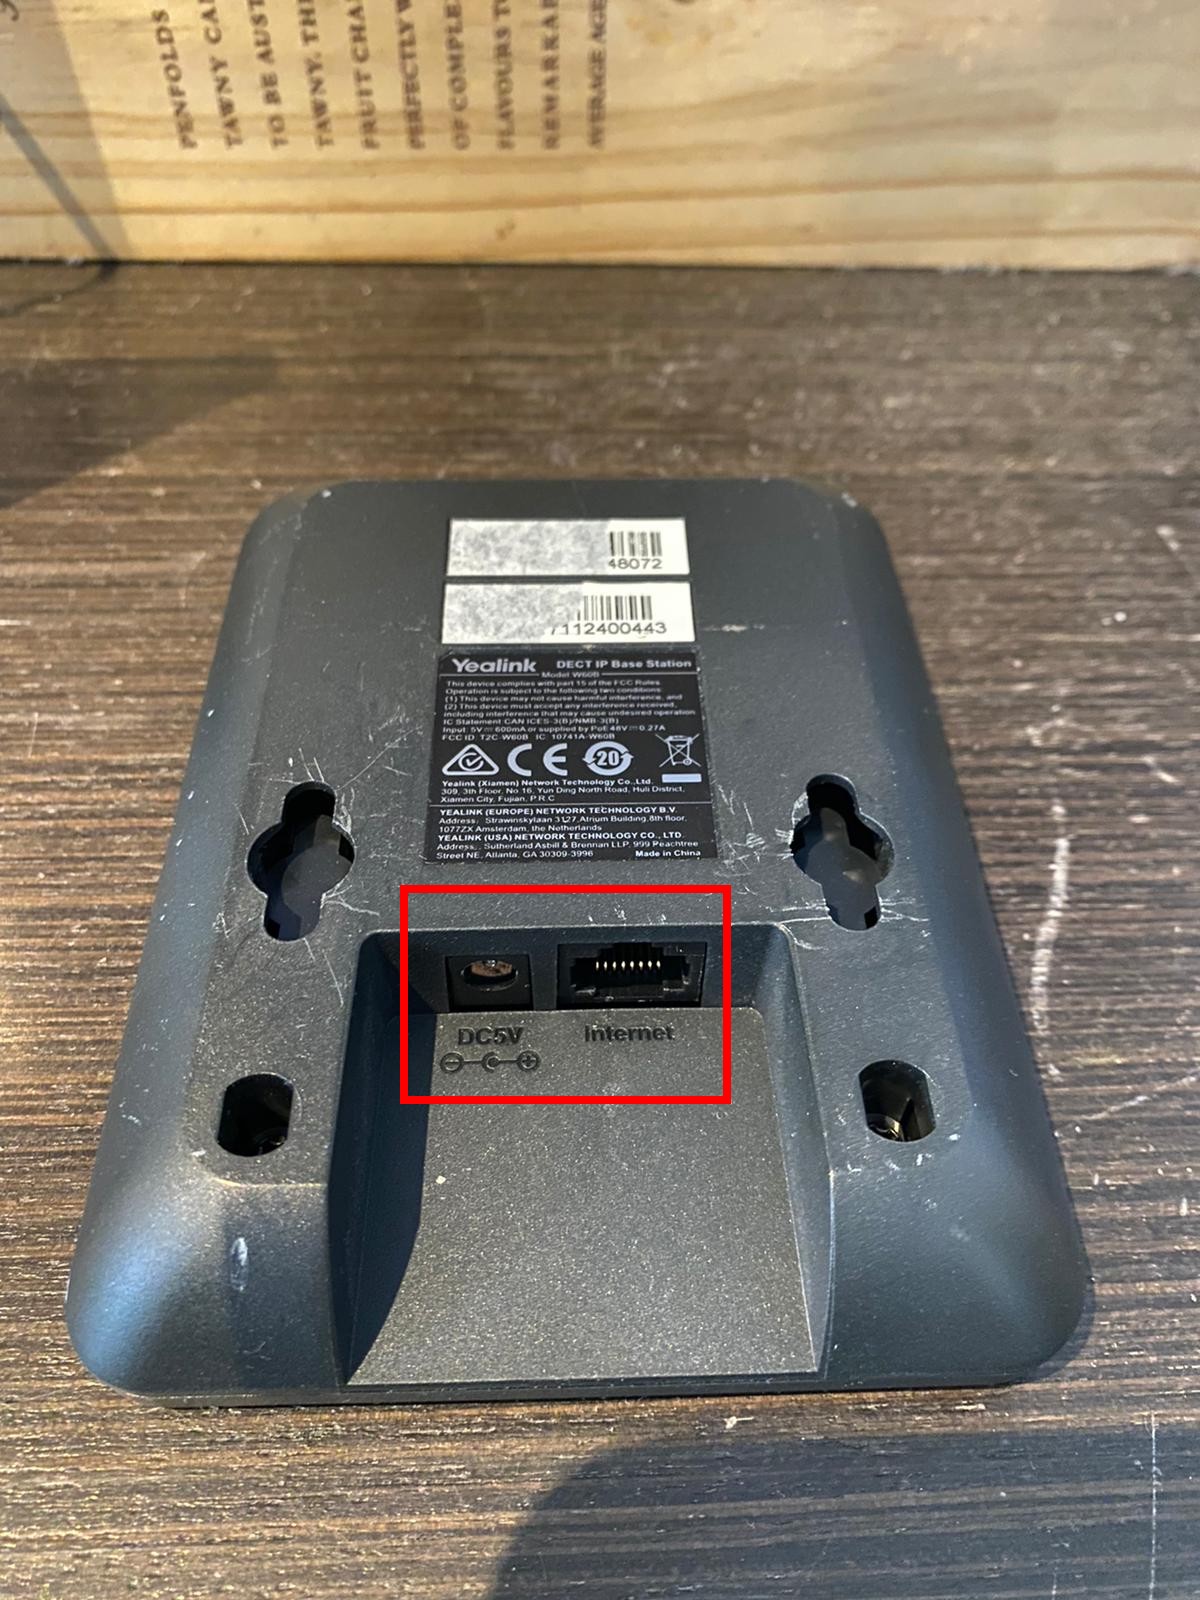
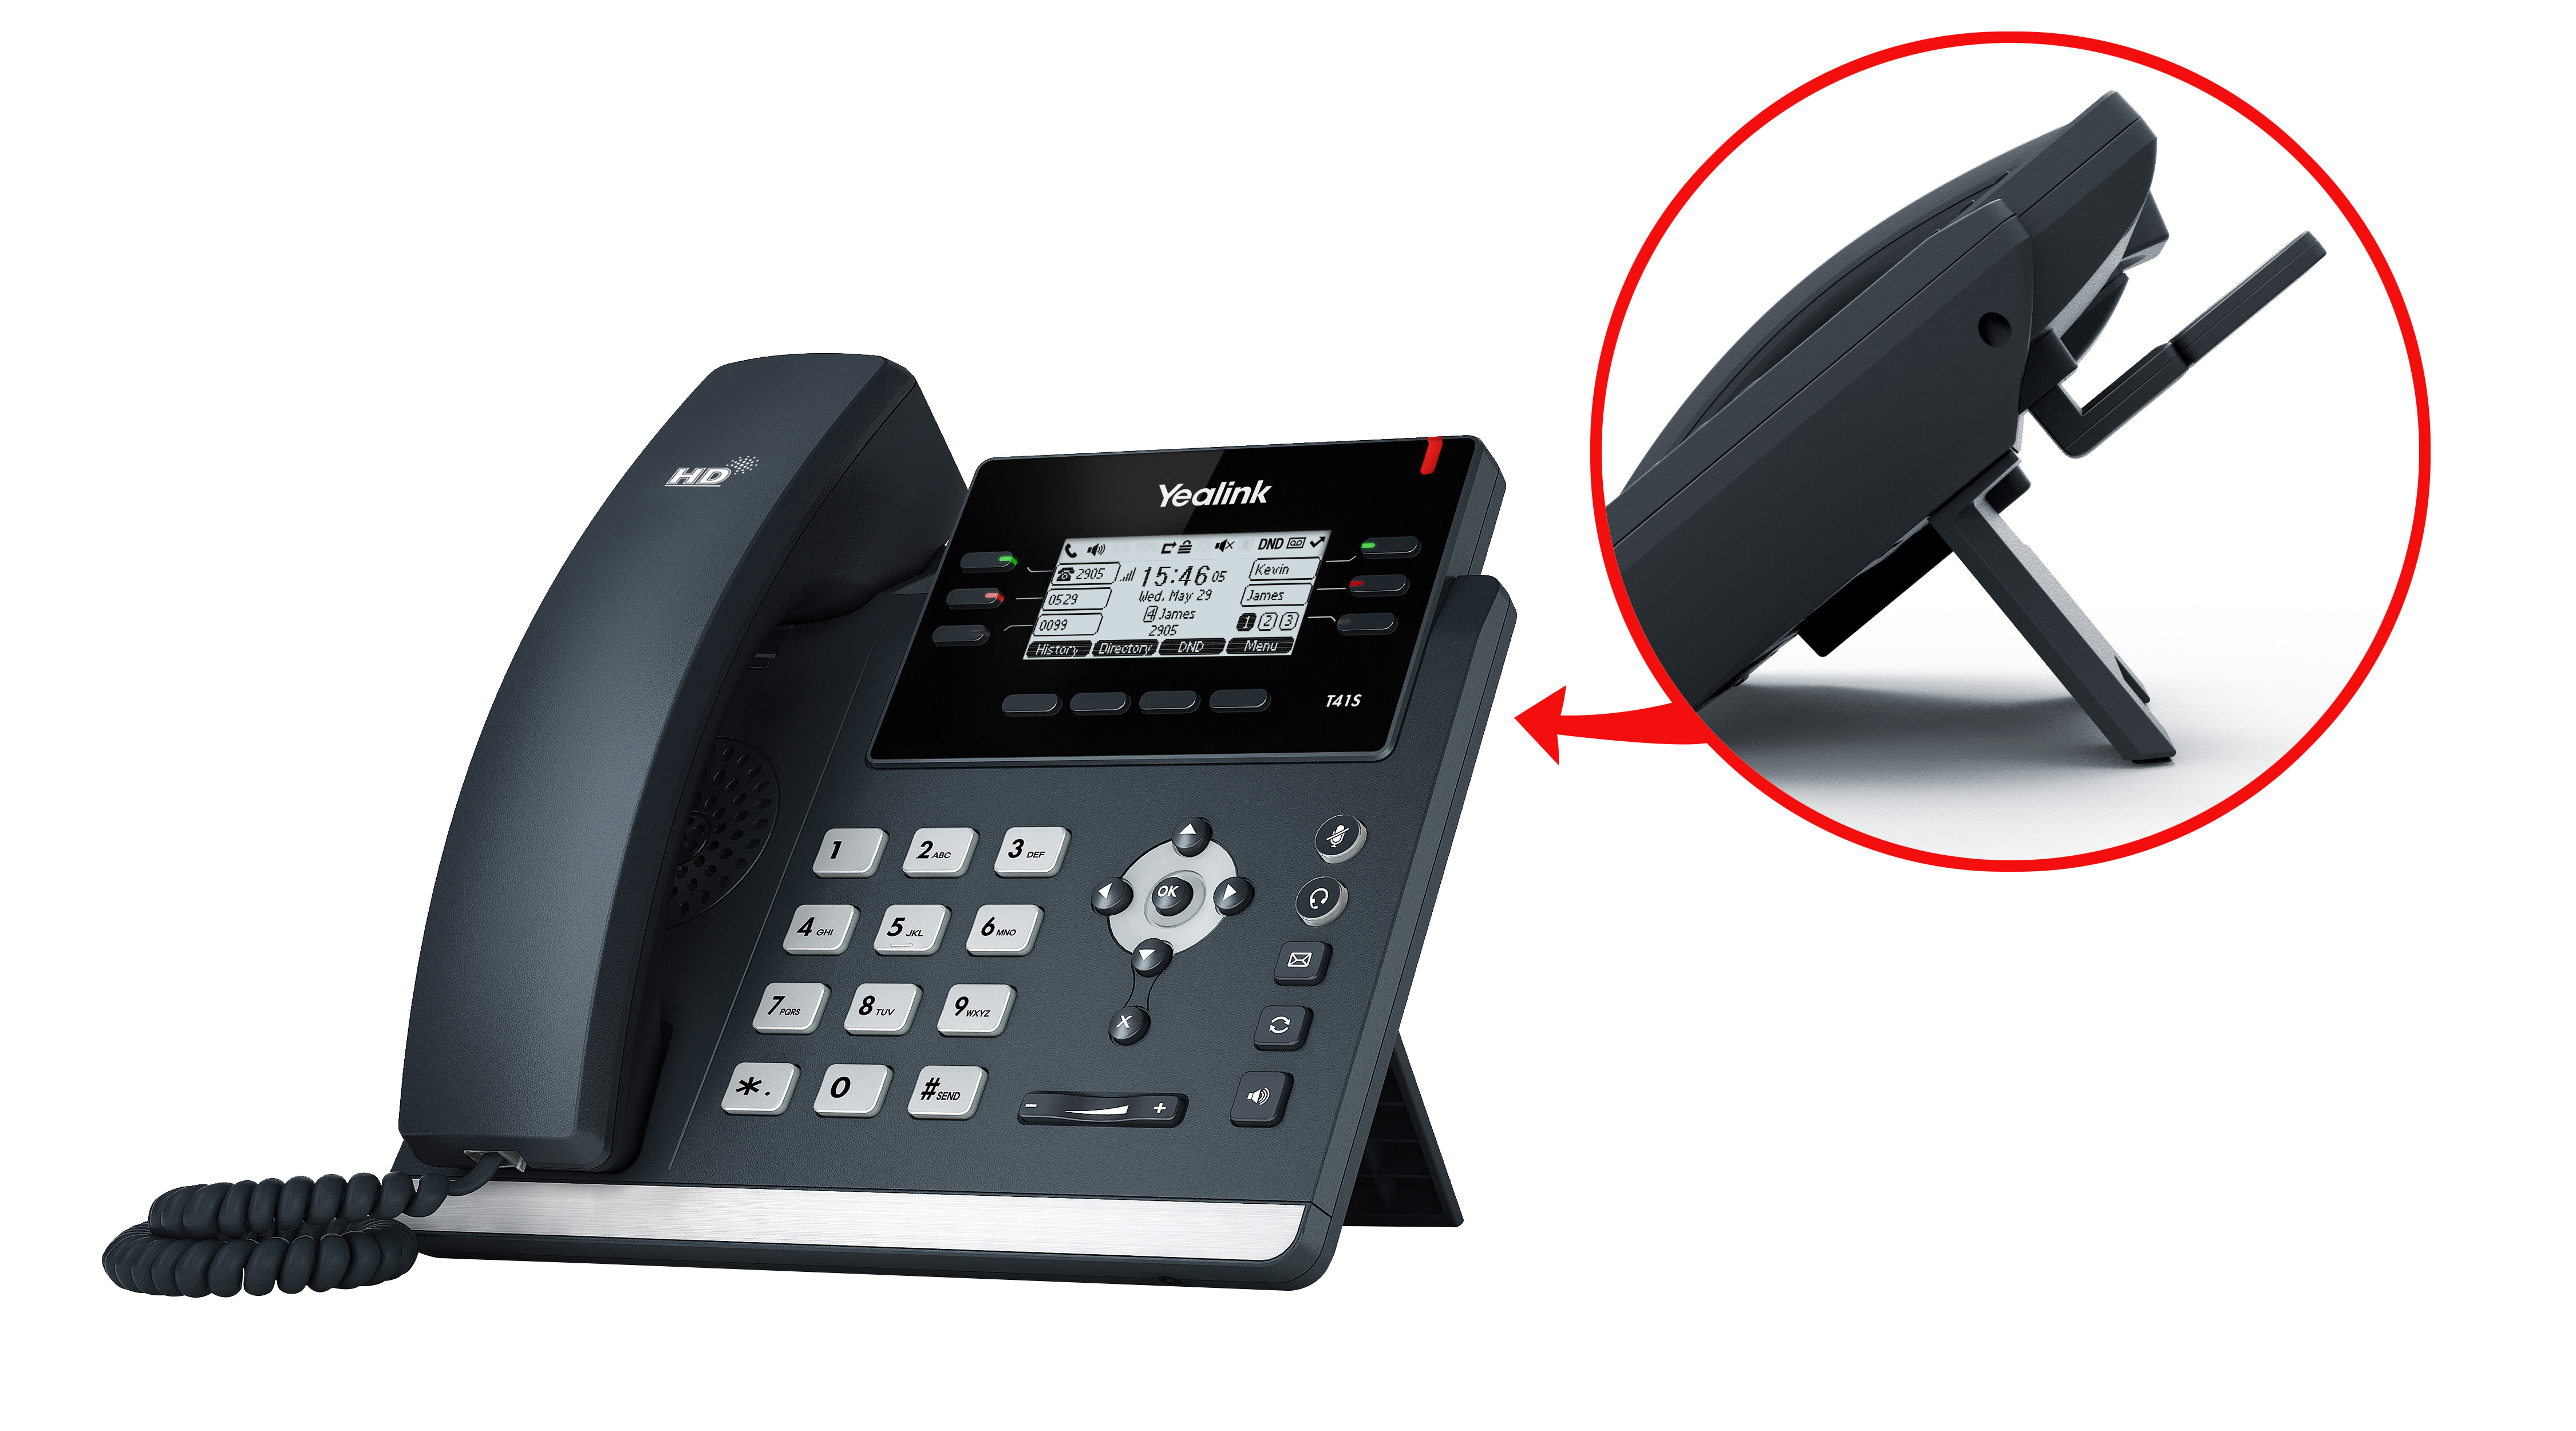
To start the configuration process you will need to unpack the device and connect the handpiece, power supply and mounting bracket. Follow the instructions booklet included with the device for further guidance. Replicate the diagram below by connecting the ethernet cable to the internet port located at the back of the phone. If you are operating PoE or Power over Ethernet network switch within your internal network, do not plug the power adapter in.

back.jpeg

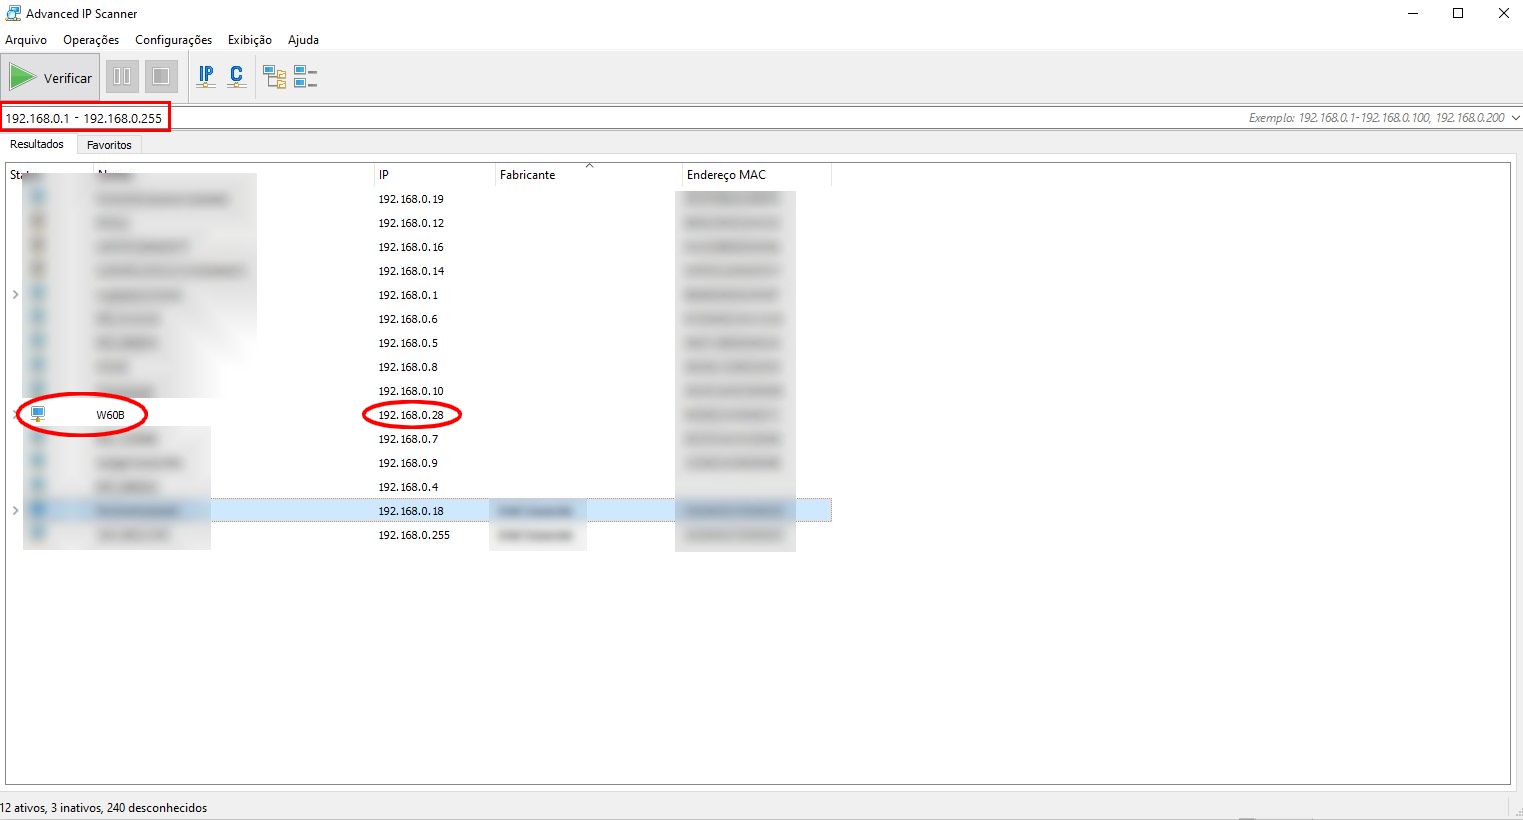
Powering your Yealink device will obtain an IP address from your network which can be located by clicking the menu > ‘status’ > select base on the W53H cordless handset > click OK. Alternatively, download third-party software, such as ‘advanced IP scanner’. Once downloaded and running, you can define your internal IP range to be scanned. The base station ‘W60B’ will be shown and present its IP address.

advancedipscanner.JPG

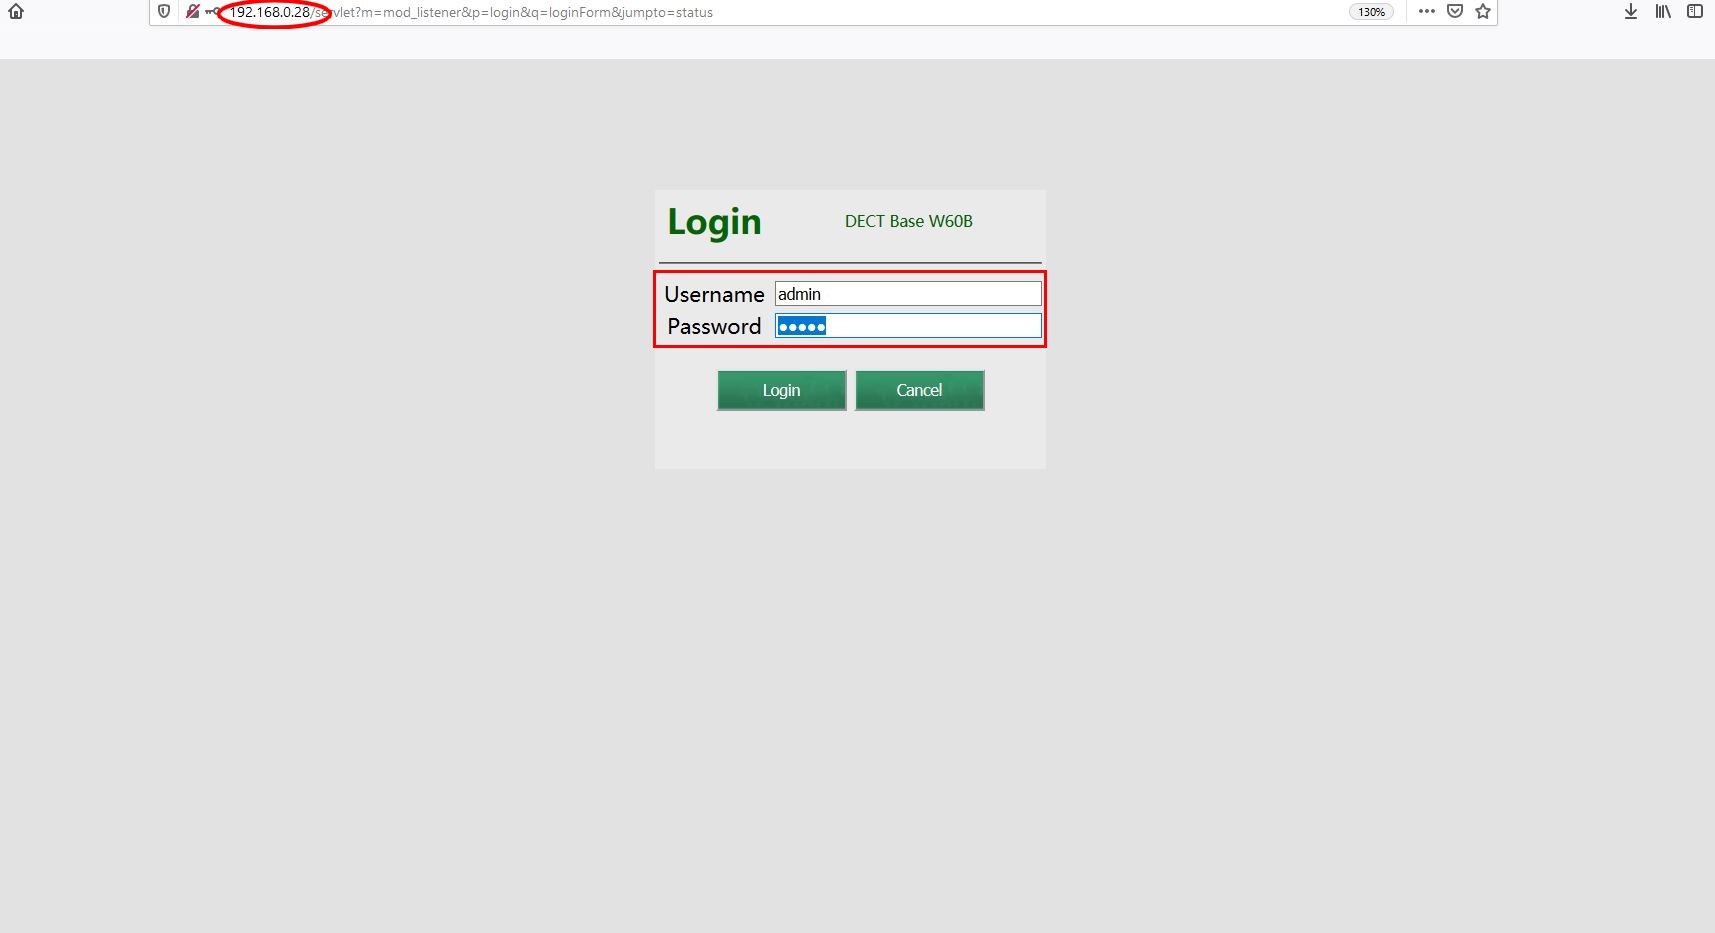
Open a web browser on your PC on the same network as your Yealink DECT, and enter the previously obtained IP address into the browser. The login page will populate, prompting you to enter the Yealink admin credentials. By default, it is “admin” for username and password.

1.JPG

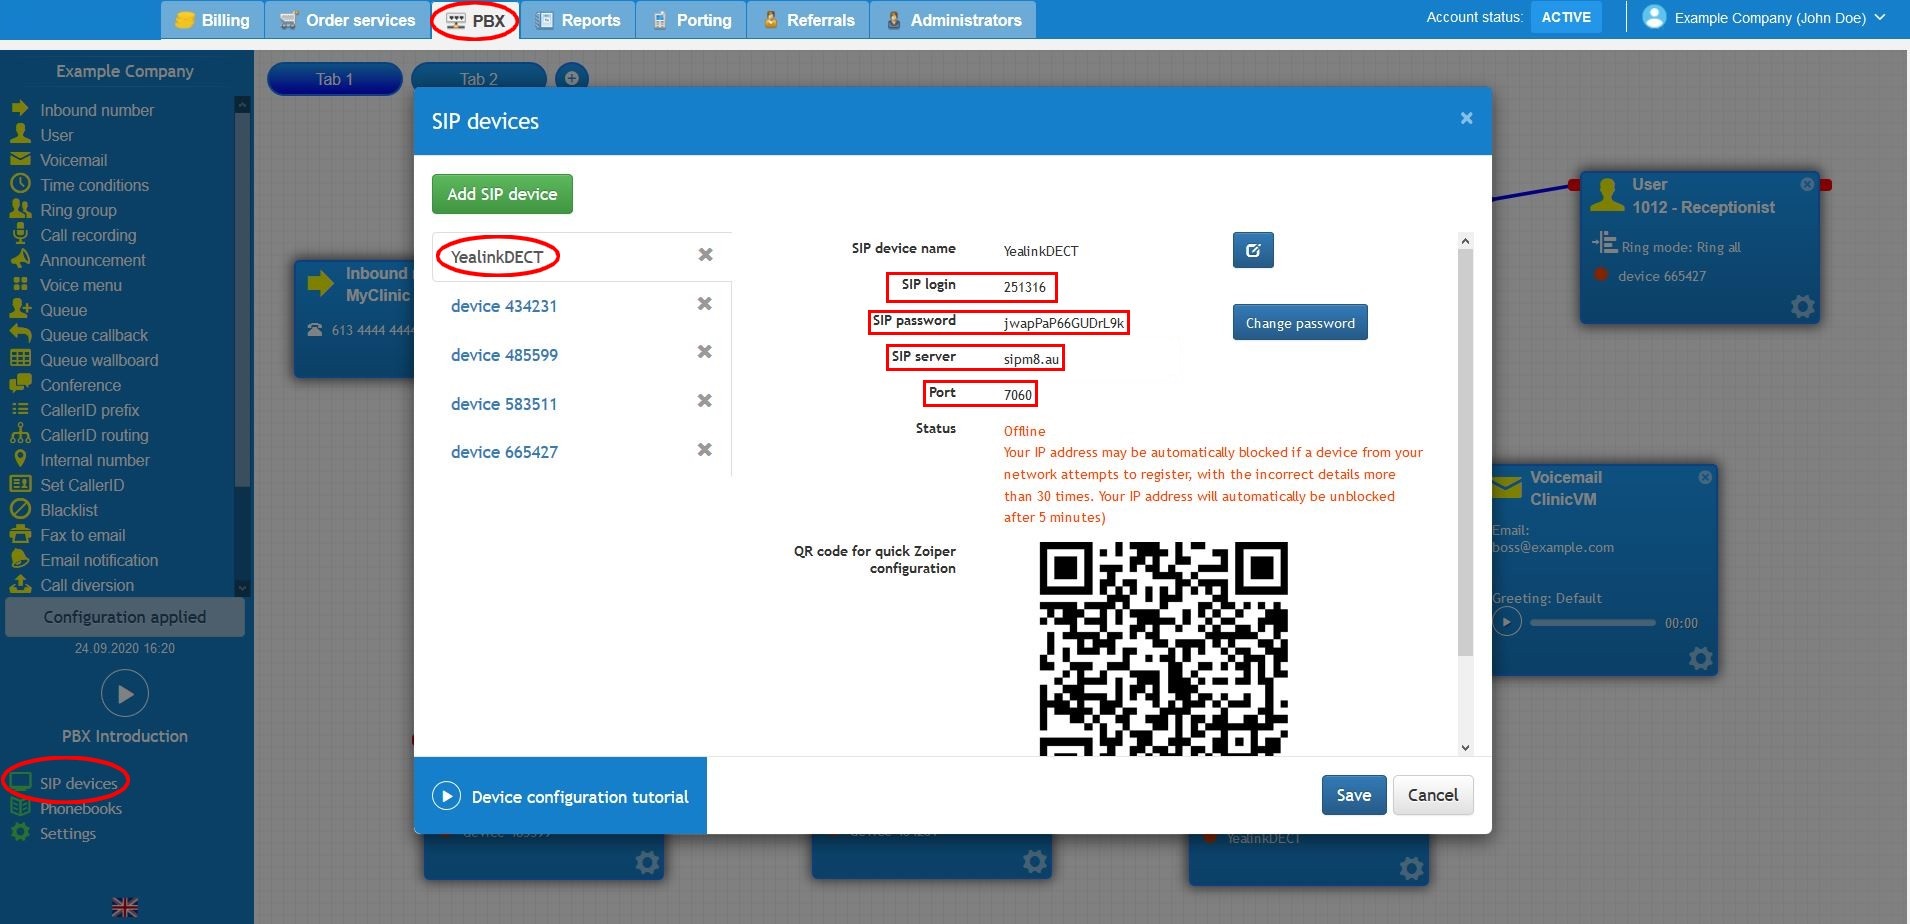
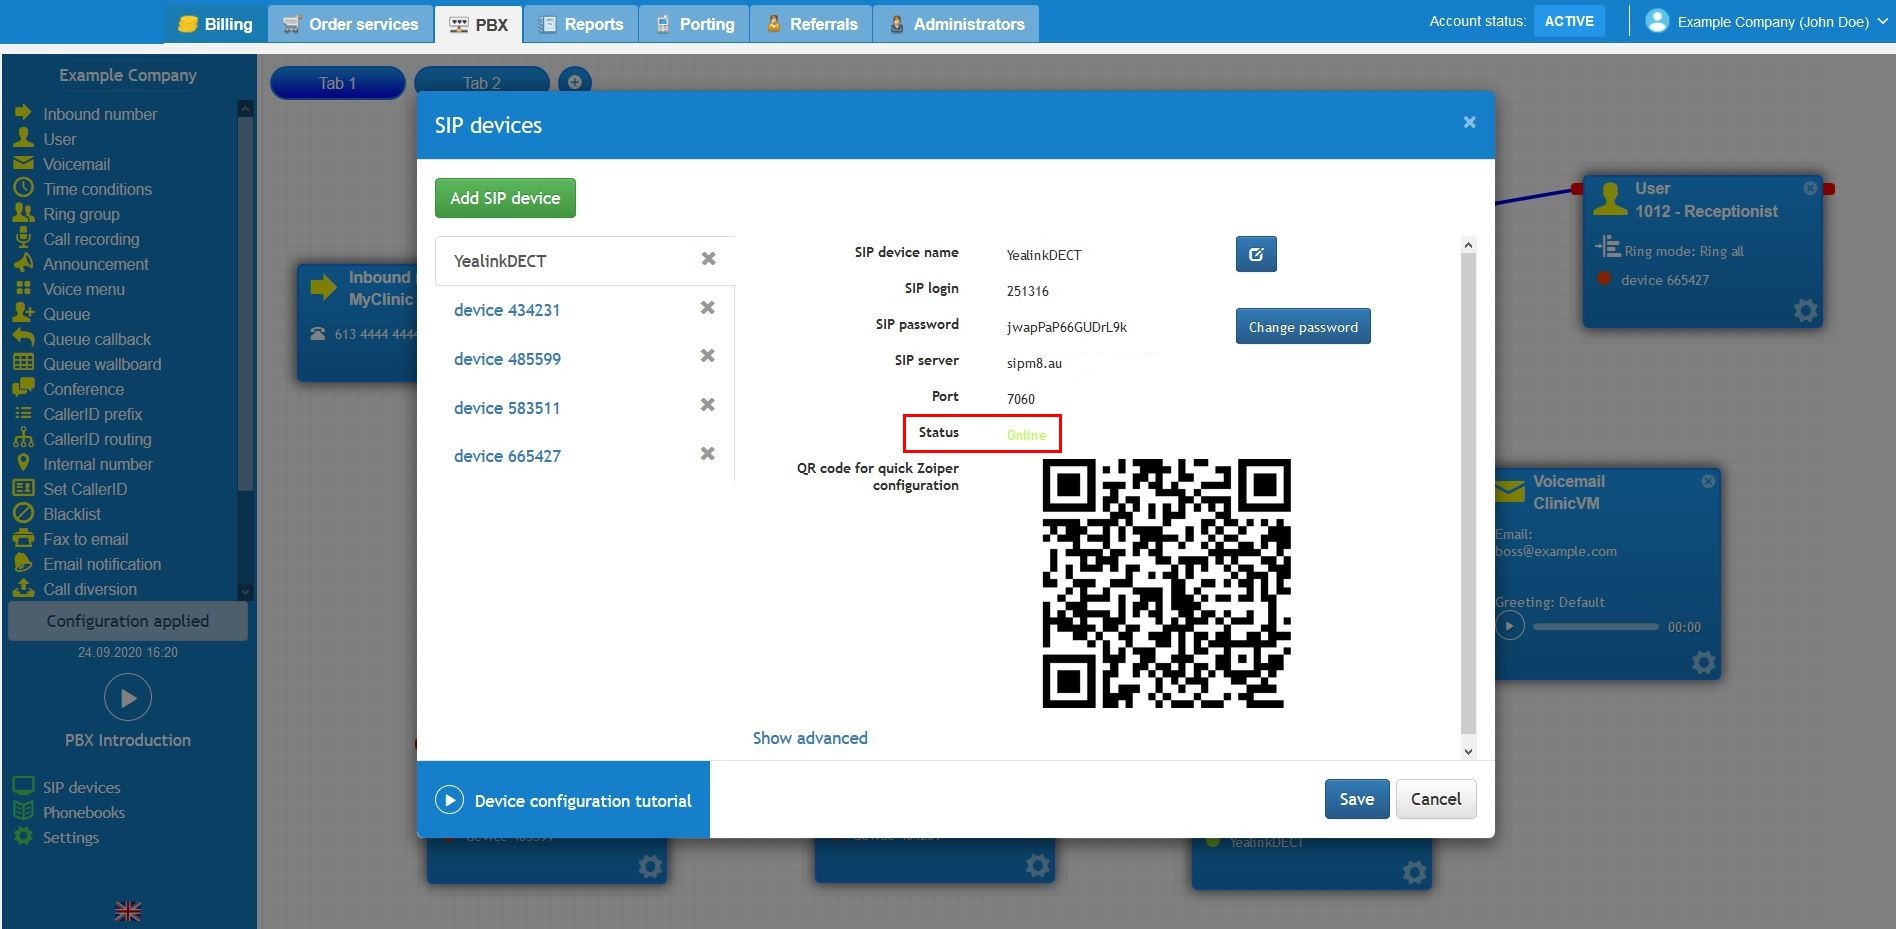
Next, login to your customer portal, select the PBX tab and click on SIP devices towards the bottom-left corner. Select the SIP device you would like to connect to your Yealink cordless handset and record the SIP login, password, SIP server and port number details.

2.JPG

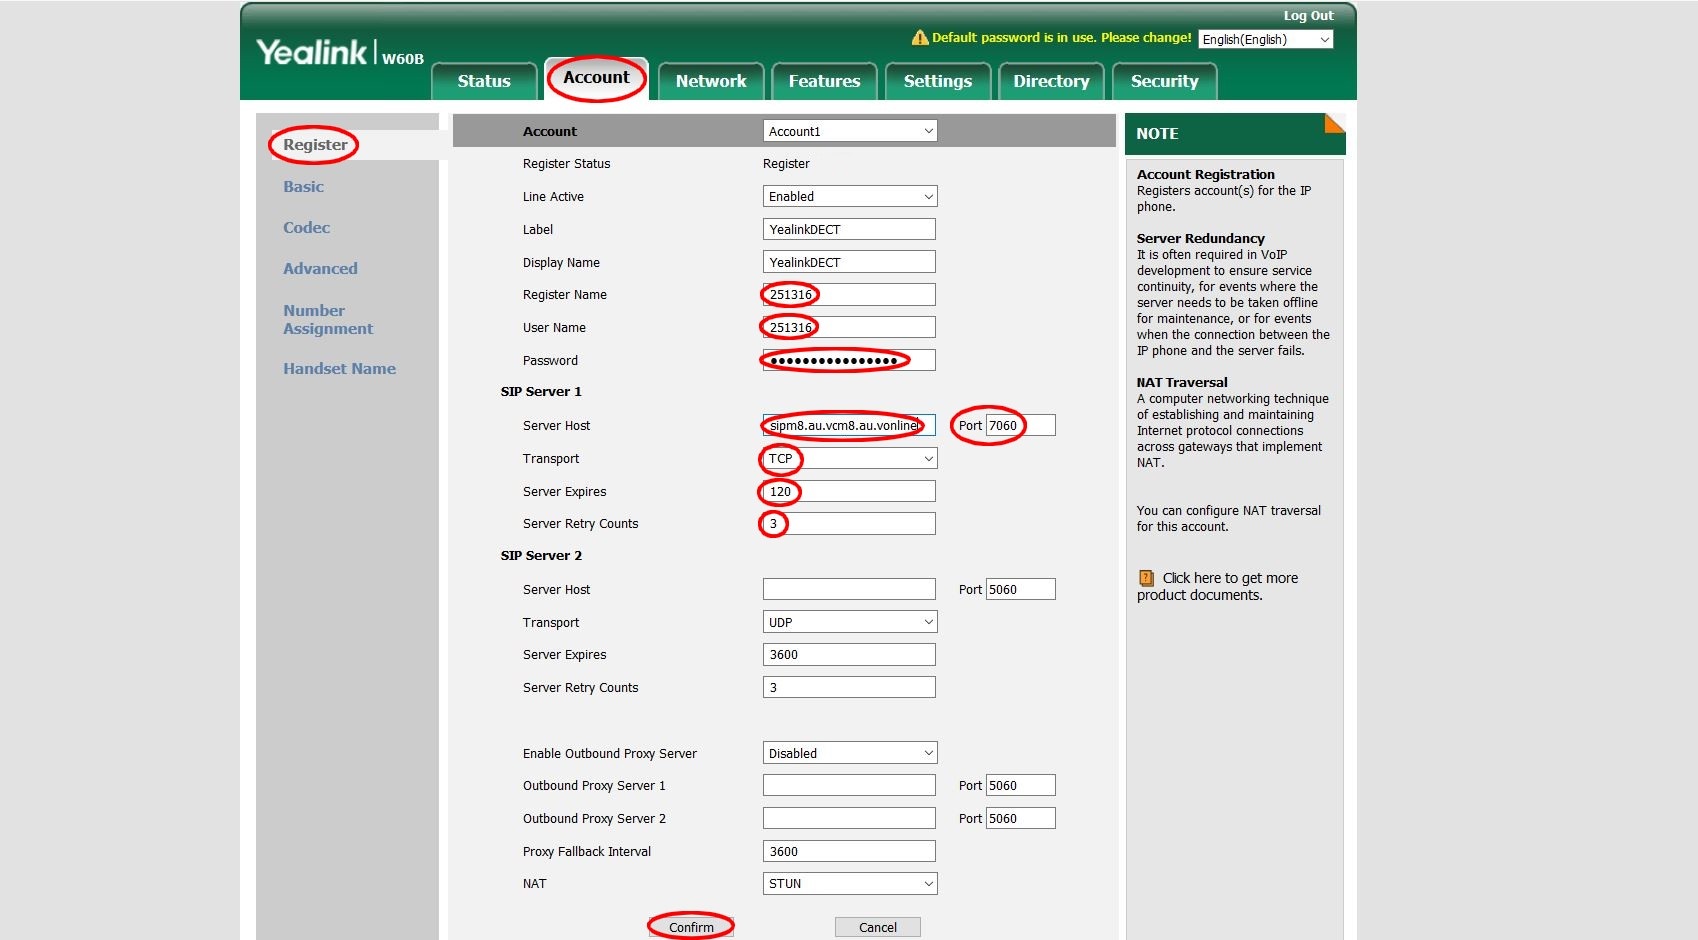
Head back to the Yealink web configuration screen, click on the account tab, followed by the register button from the menu on the left. As shown in the image below, enter your SIP device details in the required fields. We recommend selecting TCP as the transport protocol and setting the registration server expiry to 120 seconds. After entering the device information, click confirm towards the bottom of the page. Please note, if you would like to set additional Yealink cordless handsets, you will be required to order more SIP devices. Once ordered, configure a second account on the ‘account’ drop-down list within the Yealink web configuration screen.

3.JPG

Once you have entered the details, head back to your PBX and the device status should change to green, indicating the device is online and has connected successfully. If the device is still red, double-check to ensure you have clicked the Apply configuration button and the input details in the web-configuration are correct. Allow up to 15 minutes when re-entering the device details to complete the registration.

4.JPG

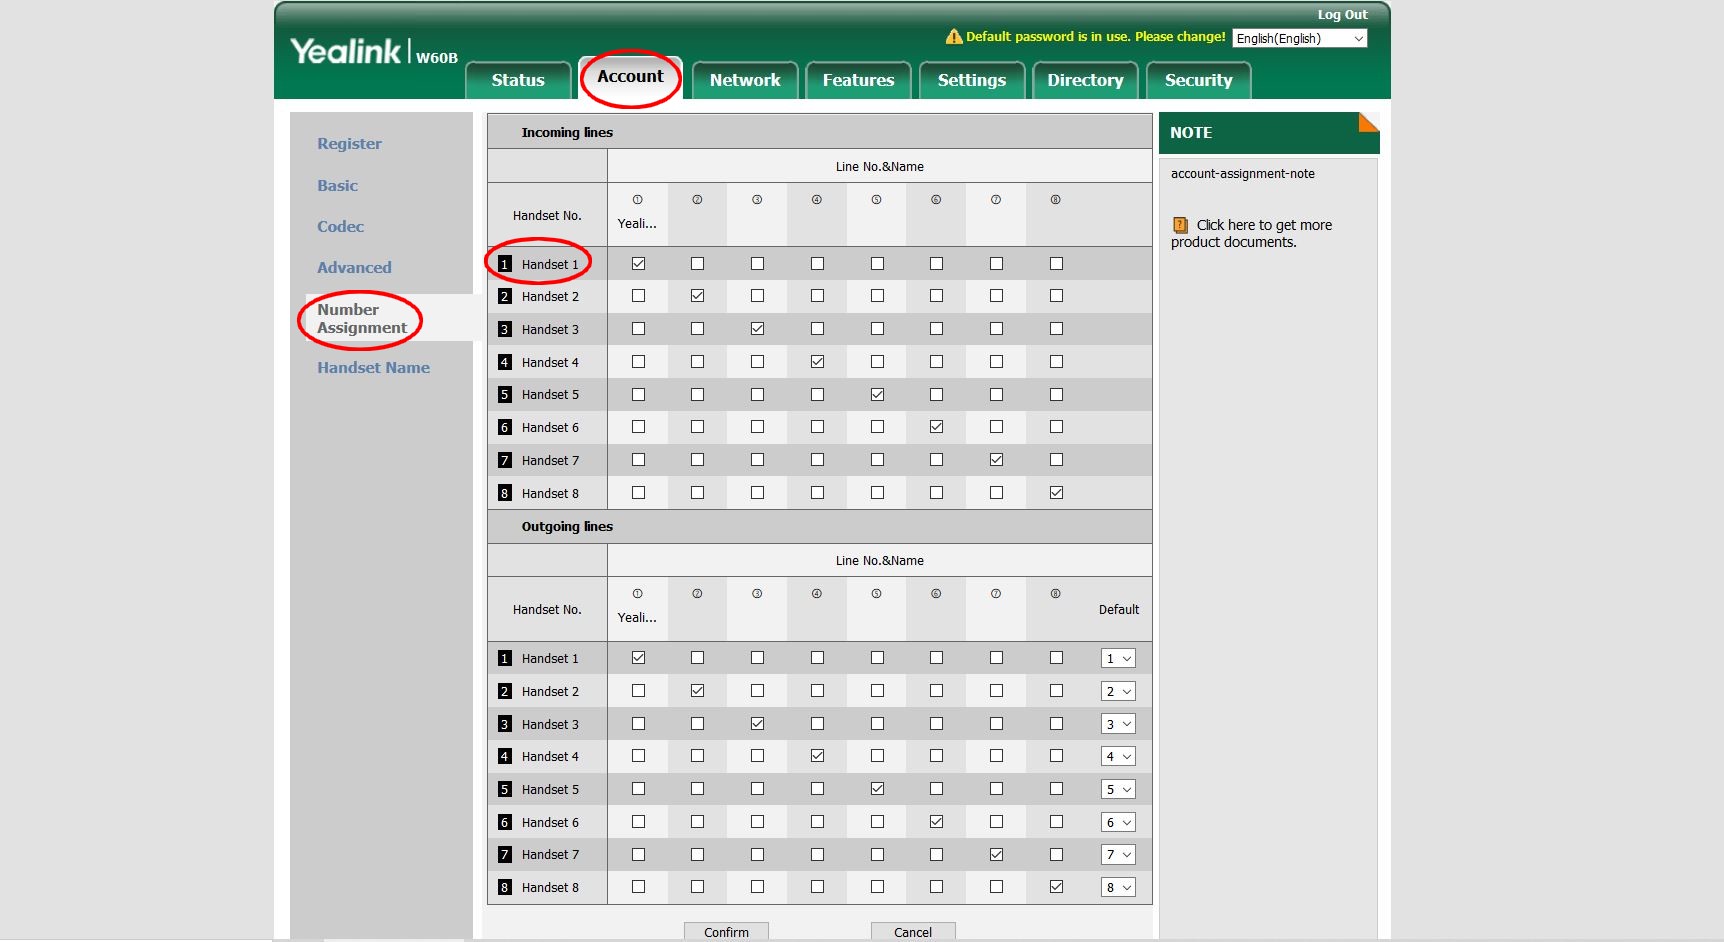
Head back to the Yealink web configuration screen to manage which SIP device is linked to which Yealink cordless handset. Select the account tab and click on ‘number assignment’ on the left menu. A table will generate, displaying the active lines to the handsets.

5.JPG

#

Transferring calls using a Yealink DECT phone (W53H and W60H) #

There are three ways to simply transfer calls to other users on a Yealink W56H. This includes blind transfers, semi-attended transfers and attended transfers.

Blind transfer #

Blind transfer refers to a call being directly transferred to a third party without consulting beforehand. To blindly transfer a call to another user, click on options while you have a customer on the line. Then, select transfer and enter the extension or number you wish to send the call through and click transfer.

WhatsApp-Video-2020-10-07-at-170_2_.gif

Semi-attended transfer #

Semi-attended transfer refers to a call being transferred to a third party while the extension rings, and before the person at the extension answers the call. To complete a semi-attended transfer to another user, click on options while you have a customer on the line. Then, select transfer and enter the extension or number you wish to send the call through and press OK. Once you hear the dialled extension’s ringtone, click transfer to send the call through.

WhatsApp-Video-2020-10-07-at-170_1_.gif

Attended transfer #

Attended transfer refers to a call being transferred to a third party with prior consultation with the dialled user. To complete an attended transfer to another user, click on options while you have a customer on the line. Then, select transfer and enter the extension or number you wish to send the call through and press OK. Once the dialled user answers the call, click transfer to send the call through. If the user is unavailable to take the call, the call will divert back to the original caller.

WhatsApp-Video-2020-10-07-at-170.gif

Yealink T5 DECT mode #

Some of the Yealink devices, such as T53W, T54W, T57W, T58A, T58V and T59 are capable of acting as a DECT base station while using a Yealink DD10K Dect USB Dongle. Please note that the Yealink DD10K DECT USB Dongle must be purchased separately from the other Yealink handsets. When acting as a base station, the T5 handset itself is still fully capable of making and receiving calls.

1.jpg

Setting up the Yealink handset as a DECT base #

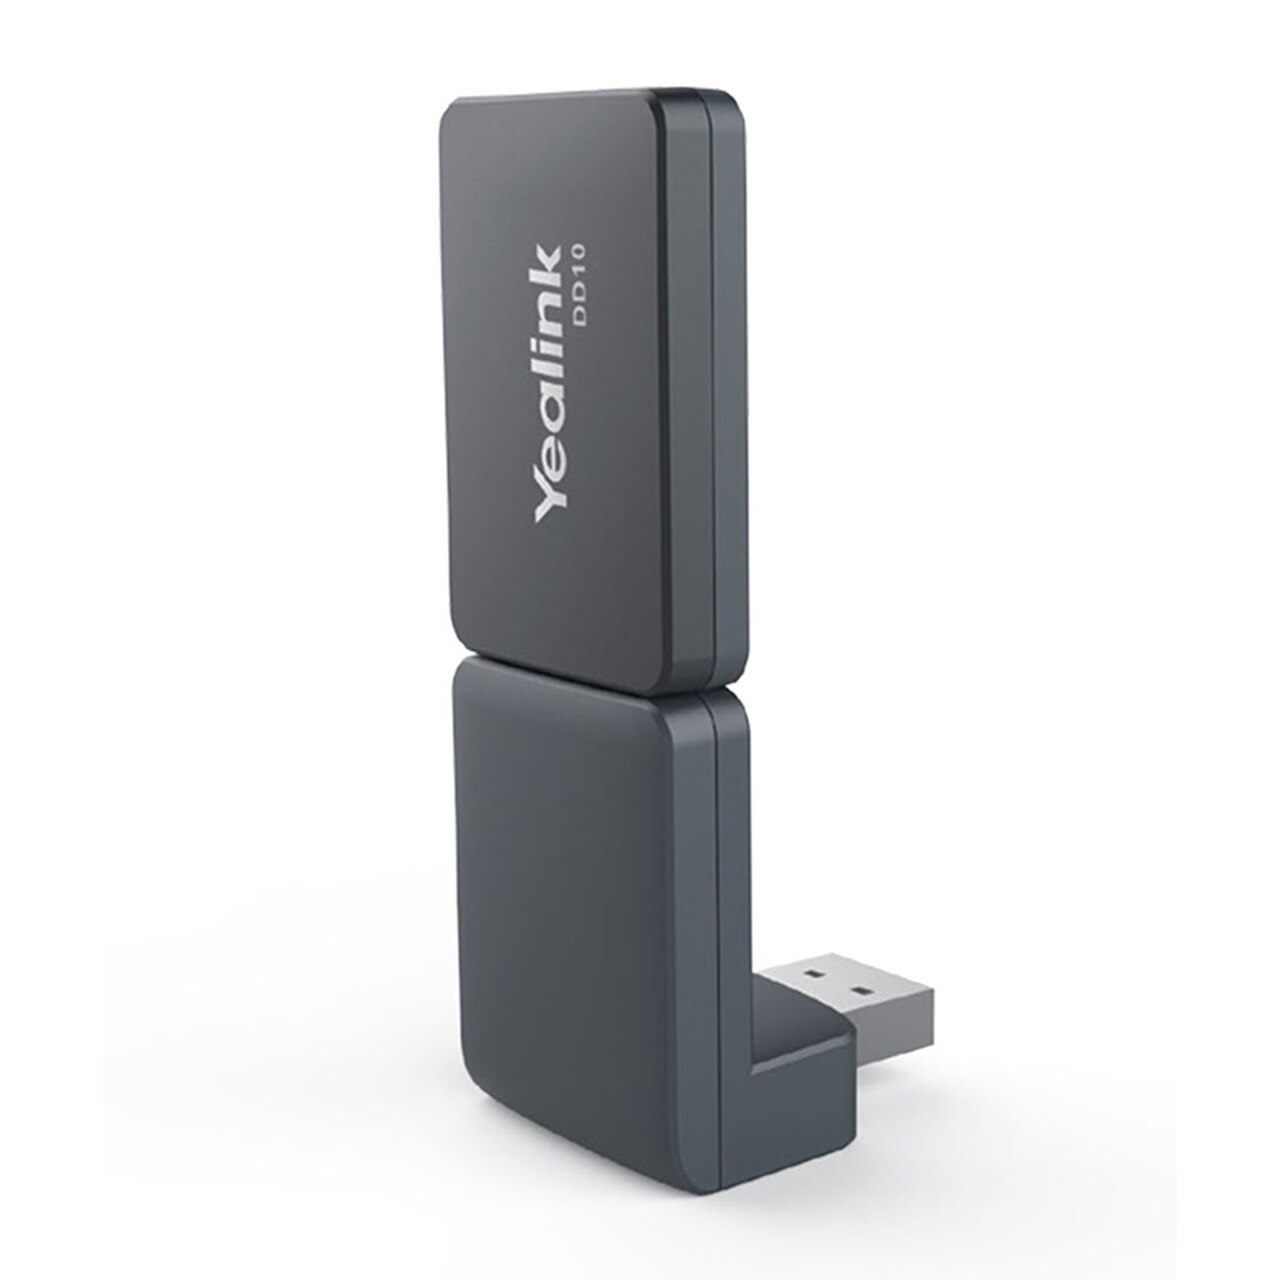
Firstly, plug the DD10K to the USB port of the handset, as shown in the image below. Once plugged in, you should be able to identify new options on the web interface configuration of the phone.

2.jpg

Next, register the other Yealink handsets by following the instructions described in the “connecting your device” section of this article. Select the “number assignment” button from the left-hand side menu and relate the configured SIP accounts to the handsets connected to the base station. Lastly, confirm the changes and make a test call to ensure the phones have the ability to place and receive calls.

mceclip1.png

Transferring calls between handsets on T5 DECT mode #

Once you have registered at least one DECT phone to the T5, you will have the ability to activate the master/slave mode. This mode allows you to seamlessly transfer calls between the T5 phone and the registered DECT handset. To enable the master/slave mode, access the handset’s web-configuration > select the handset from the left-hand side menu > choose a device as master and another as slave.

photo.jpg

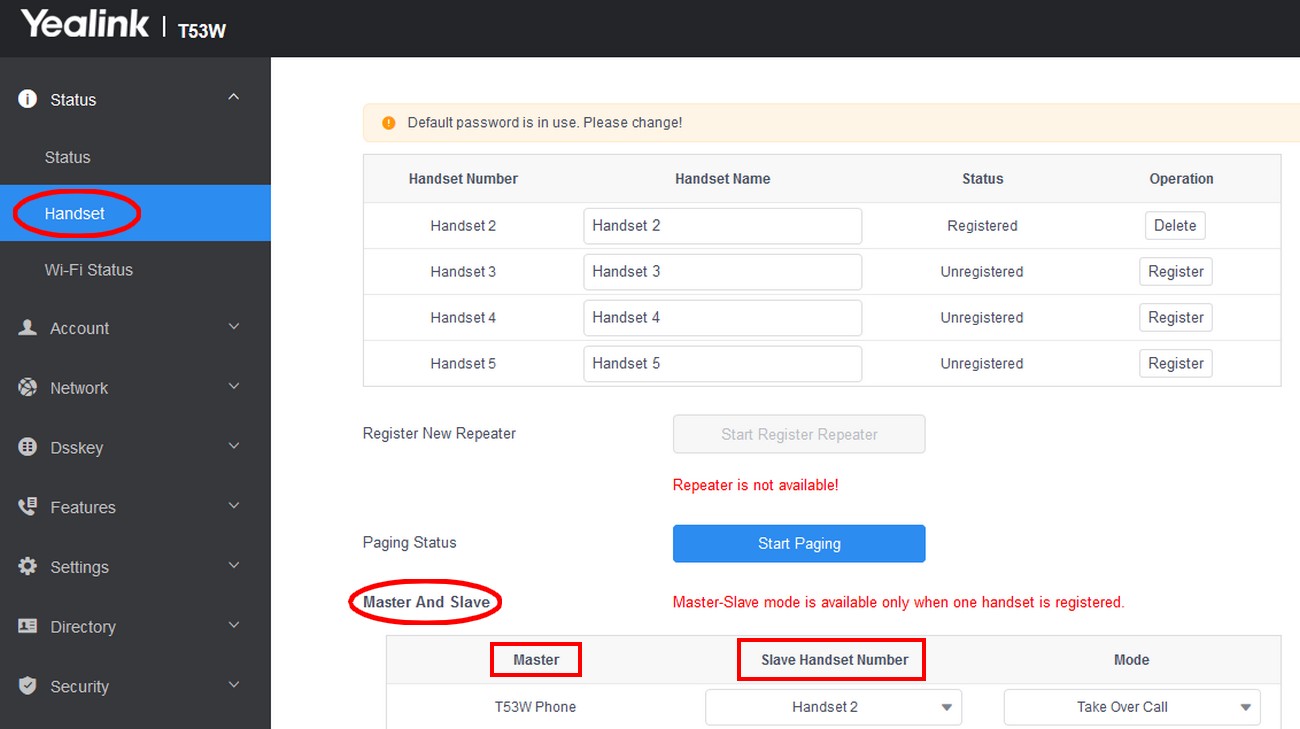
Now, when calls are answered on the master T5, you can transfer the call by pressing the more soft key and then call shift button. This action will automatically transfer the call to the slave handset. Alternatively, if you wish to transfer from the slave device to the master, you only need to press transfer and then the intercom option.

What are your Feelings
Share This Article :
  • Facebook
  • Twitter
  • LinkedIn
  • Pinterest
Still stuck? How can we help?

How can we help?

Updated on 20 June 2023
Table of Contents
  • In this article
  • Introduction
  • Connecting the device and locating the IP address
  • Transferring calls using a Yealink DECT phone (W53H and W60H)
  • Blind transfer
  • Semi-attended transfer
  • Attended transfer
  • Yealink T5 DECT mode
  • Setting up the Yealink handset as a DECT base
  • Transferring calls between handsets on T5 DECT mode
About Us
  • Contact Us
  • Privacy Policy
  • Service Agreements
Support
  • Guides & Support
  • Uptime & Outages
Portal
  • My PBX
  • My Hosting
  • Help Me

  BGP Telecom is a Telecommunications Industry Ombudsman (TIO) compliant business.

Copyright © 2023 BGP Group Pty. Ltd. | ABN: 25641461574